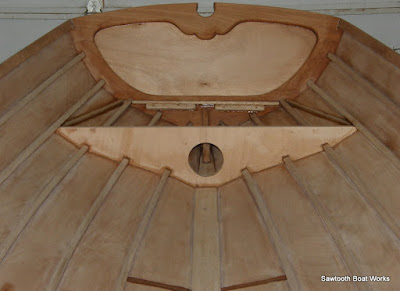
A bevel in progress.
There are a number of things that need to take place after one plank is completed and the next plank is ready to be epoxied into place.
Bevels:
The first step is to remove the 85+ screws used to clamp the previous plank while its epoxy cures. Once the screws have been removed, the edge of the plank can be trimmed flush with the stringer it is attached to. The router makes quick work of the trimming except around the stem, transom, and bulkheads. In these areas, the trimming is done with a combination of saw, file, and plane. Once the edge is trimmed, a line is drawn 3/4" from the edge of the planking marking where the edge of the next plank will lie. The space must be beveled so that it is on the same plane as the adjacent stringer so that the next plank will have a flat area to lie on. Some beveling will need to be done on the adjacent stringer for the same reasons. Besides beveling the plank edge and the stringer, the bulkheads and transom must also be beveled to accept the new plank. The final step in prepping for the next plank is cutting the gain which was covered in a prior post.
Fitting the plank:
To fit the next plank, the planking stock is clamped to the boat and lines are drawn on it using the stringers for guides. The plank is rough cut a few inches wider than the lines to provide some room for adjustments and to provide for the 3/4" that needs to be added for the 'lap' section that overlaps the adjacent plank (that we just beveled). Once the new plank has been cut out, it can be re-clamped to the boat and new, more accurate lines can be traced onto it. The plank is then removed again so that 3/4" can be added to the arc drawn for the lap edge. A batten is then used to connect the 3/4" marks and redraw the curve. The plank is then sawn about 1/8" outside this line and then a plane is used for final trimming to the line. The final step for this plank edge is to sand it with a sanding block further fairing the curve and putting a slight radius on the outer edge.
After the lap edge is ready, the plank is clamped back on the boat to continue with the fitting process. The lap edge is checked to see that it matches up with the 3/4" line that was drawn for the bevel on the adjacent plank. The fit at the gain is also checked and adjusted as needed. If all fits well, then a line is drawn 3/8" in from the lap edge which will designate the middle of the stringer below it. This will be used when laying out screw locations. If the fit looks good, a couple of screws will be put in to keep the plank from moving throughout the rest of the fitting. The middle of the lower stringer can now be transferred to the plank and marks are made about every four inches on both the top and bottom lines for screw locations. After pre-drilling all of the screw holes, the position of the scarf is marked and the plank is removed to cut the scarf. Epoxy is brushed onto the plank and the boat before applying thickened epoxy to all of the mating surfaces. After the plank has been screwed to the boat, all of the epoxy 'squeeze out' must be cleaned up immediately. Excess epoxy is scraped off and then a final cleaning is done using acetone.
That completes the fitting of one of the half planks. Attaching the other half plank entails the same steps with a few slight differences. The scarf will now be on the bottom of the plank instead of the top like the previous plank and two inches must also be added to the plank for the scarf. Each full plank takes about six hours to complete. (6 hours x 12 planks = 72 hours of planking).
Row, row, row your boat...life is but a dream.


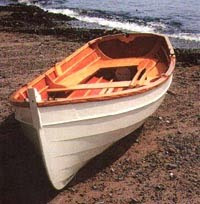
 After applying two coats of CPES Penetrating Epoxy Sealer, Tom applied three coats of Epifanes Clear Varnish with a light sanding in between each coat. After the varnish cured, the boat was flipped and prepped for painting. After applying two coats of Interlux Primer and two coats of Interlux Brightside White paint with, once again, a light sanding in between coats, we are close to being finished.


